
Clockify is a popular time-tracking tool. To use it, you need to log in.
Logging into Clockify is simple and quick. This process allows you to track time, manage projects, and improve productivity. Whether you’re a freelancer, a small business owner, or part of a large team, accessing Clockify’s features starts with a secure login.
With your credentials, you can unlock a world of efficient time management. This blog will guide you through the Clockify login process, ensuring a smooth start to your time-tracking journey. Let’s dive in and make your Clockify experience seamless.
Introduction To Clockify
Clockify is a popular time tracking tool used by individuals and teams. It helps manage work hours effectively. Understanding how to use Clockify can boost productivity and ensure accurate time management. In this blog post, we will provide an introduction to Clockify.
What Is Clockify?
Clockify is a free time tracking software. It allows users to track time spent on various tasks. It is suitable for freelancers, businesses, and anyone needing to monitor work hours. Clockify offers features like timesheets, reports, and project management.
It is accessible on multiple devices, including desktops and mobile phones. This flexibility ensures users can track time anywhere. The platform also integrates with other tools, making it versatile and convenient.
Importance Of Time Tracking
Time tracking is crucial for productivity. It helps identify how time is spent during the day. By tracking time, individuals can recognize patterns and adjust their schedules. This leads to better time management and increased efficiency.
For businesses, time tracking ensures accurate billing and payroll. It provides insights into project progress and team performance. This data helps in making informed decisions and improving overall workflow.
Using a tool like Clockify simplifies time tracking. It offers detailed reports and easy-to-use interfaces. This makes it easier to keep track of time and stay organized.
Creating A Clockify Account
Creating a Clockify account is simple and quick. With just a few steps, you can start tracking your time efficiently. Below are the steps to get you started.
Sign-up Process
To create a Clockify account, follow these steps:
- Visit the Clockify website.
- Click the Sign Up Free button.
- Fill in your email and password.
- Click Sign Up.
Alternatively, you can sign up using your Google or Microsoft account. This option can save you time and simplify the process.
Account Verification
After signing up, you need to verify your account. Here’s how:
- Check your email for a verification message from Clockify.
- Open the email and click the Verify Email button.
- After verifying, you can log in to your new Clockify account.
Verifying your account is essential to ensure the security and authenticity of your profile.
Once your account is verified, you can access all the features Clockify offers. Use the login details you created during sign-up.
Navigating The Dashboard
After logging into Clockify, the dashboard is your main control center. It is where you can track time, manage projects, and review reports. Understanding the layout and key features helps in efficiently managing your tasks.
Dashboard Layout
The Clockify dashboard is user-friendly and neatly organized. The main sections are:
- Time Tracker – Start and stop the timer.
- Timesheet – View and edit your logged hours.
- Projects – Manage your projects and tasks.
- Reports – Generate detailed time and productivity reports.
Each section is easily accessible from the left sidebar. The main screen displays real-time data, helping you stay updated.
Key Features Overview
Clockify offers several key features to enhance your productivity:
- Time Tracking – Track time spent on tasks with a single click.
- Manual Entries – Log your hours manually if you forgot to start the timer.
- Project Management – Assign tasks, set deadlines, and monitor progress.
- Detailed Reports – Generate reports to analyze your time usage and efficiency.
These features are designed to help you manage your time better and stay organized.
Below is a simple table summarizing the key features:
| Feature | Description |
|---|---|
| Time Tracking | Track time with a click. |
| Manual Entries | Log hours manually. |
| Project Management | Manage tasks and deadlines. |
| Detailed Reports | Analyze time usage. |
Clockify Login Process
Clockify is a popular time tracking tool that helps manage your work hours. The Clockify login process is simple and quick. Whether you are a new user or a returning one, this guide will help you understand the steps to log in and troubleshoot any issues you might face.
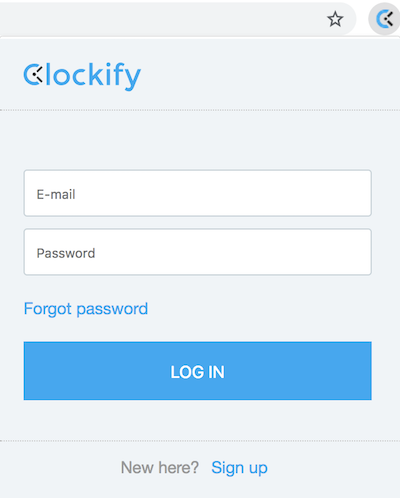
Login Steps
- Open your web browser and go to the Clockify website.
- Click on the “Login” button at the top right corner.
- Enter your email address and password in the respective fields.
- Click the “Log In” button.
Note: If you have signed up using your Google or Microsoft account, click on the respective button to log in.
Troubleshooting Login Issues
Facing issues while logging in? Here are some common problems and their solutions:
| Issue | Solution |
|---|---|
| Incorrect Email or Password | Ensure you enter the correct email and password. Use the “Forgot Password” link if needed. |
| Account Not Activated | Check your email for the activation link. Click to activate your account. |
| Browser Compatibility | Ensure you are using a compatible browser. Update your browser or try a different one. |
| Network Issues | Check your internet connection. Try resetting your router or connecting to a different network. |
Tip: Always keep your browser and software up to date for the best experience.
Time Tracking With Clockify
Time tracking is essential for productivity. With Clockify, tracking time becomes effortless. Clockify offers two main ways to track time: starting a timer and manual time entries. Let’s dive into each method to see how easy it is to use.
Starting A Timer
Using a timer is simple. Log in to Clockify. Then, click the ‘Start Timer’ button. This begins tracking your work immediately. When you finish, click ‘Stop Timer.’ Your time is now logged. This method is great for tasks that start and stop frequently. You can track your work in real-time.
Manual Time Entries
Sometimes you need to enter time manually. Log in to Clockify. Click on ‘Add Time Entry.’ Enter the start and end times for your task. Add any details or notes. This method is useful for past work. You can adjust the time as needed. Manual entries give you flexibility in tracking your day.
Integrations And Extensions
Clockify offers various integrations and extensions to enhance its functionality. These tools make it easier to track time and manage projects. With integrations, you can connect Clockify to your favorite apps. Browser extensions allow you to use Clockify directly from your browser.
Popular Integrations
Clockify integrates with many popular apps. You can connect it to project management tools like Trello and Asana. This helps you track time spent on tasks easily. It also works with communication tools like Slack. This integration keeps your team updated on project progress.
You can link Clockify with Google Calendar and Outlook. This makes it simple to track time spent on meetings and events. The integration with QuickBooks helps with invoicing and accounting. These integrations save you time and simplify your workflow.
Browser Extensions
Clockify offers browser extensions for Chrome and Firefox. These extensions allow you to track time without leaving your browser. You can start and stop timers with a single click. This feature is useful for those who spend much time online.
The extension also integrates with many web apps. You can track time directly from apps like Jira, GitHub, and Basecamp. This makes it easy to stay productive without switching between tabs. The browser extensions are free and easy to install.
Advanced Features
Clockify Login offers a range of advanced features that enhance productivity. These features help manage projects, analyze data, and streamline workflows. Let’s explore some of these advanced features in detail.
Project Management
Clockify makes managing projects effortless. You can create and assign tasks with ease. Track time spent on each task to ensure efficiency.
Use labels to categorize tasks. This helps in organizing work better. The visual timeline provides an overview of project progress. This ensures that deadlines are met.
Collaborate with team members seamlessly. Share updates and track project status in real-time. This keeps everyone on the same page.
| Feature | Description |
|---|---|
| Create Tasks | Set up tasks for projects |
| Assign Tasks | Delegate tasks to team members |
| Track Time | Monitor time spent on tasks |
| Labels | Organize tasks by categories |
| Visual Timeline | View project progress |
Reporting And Analytics
Clockify’s reporting and analytics are robust. Generate detailed reports with a few clicks. These reports show how time is spent on different tasks.
Use filters to customize your reports. This provides insights into specific areas. Visual charts make data easy to understand.
Analyze productivity trends over time. This helps in identifying areas of improvement. Export reports in various formats for easy sharing.
- Detailed Reports
- Custom Filters
- Visual Charts
- Productivity Analysis
- Export Options
Tips And Best Practices
Clockify is a popular time tracking tool. It helps manage and optimize your work hours. To get the most out of Clockify, follow these tips and best practices. This guide will make your experience smoother and more efficient.
Optimizing Time Tracking
Set clear goals for your tasks. This keeps you focused and on track. Use tags to categorize your tasks. This makes it easier to find and review them later. Break down large tasks into smaller ones. This helps manage your time better.
Review your time logs regularly. This helps you identify areas for improvement. Use the Pomodoro technique. Work for 25 minutes, then take a 5-minute break. This keeps you fresh and productive.
Common Mistakes To Avoid
Do not forget to start the timer. This leads to inaccurate tracking. Avoid multitasking. It reduces the quality of your work. Focus on one task at a time for better results.
Do not ignore breaks. Resting is important for maintaining productivity. Avoid vague task descriptions. Be specific about what you are working on. This helps you and your team understand your progress.
Avoid setting unrealistic goals. Aim for achievable targets to stay motivated. Regularly update your tasks and logs. This ensures accurate tracking and better planning.
Frequently Asked Questions
How Do I Log Into Clockify?
To log into Clockify, visit the Clockify website. Click on the “Login” button at the top right. Enter your email and password. Click “Sign In. “
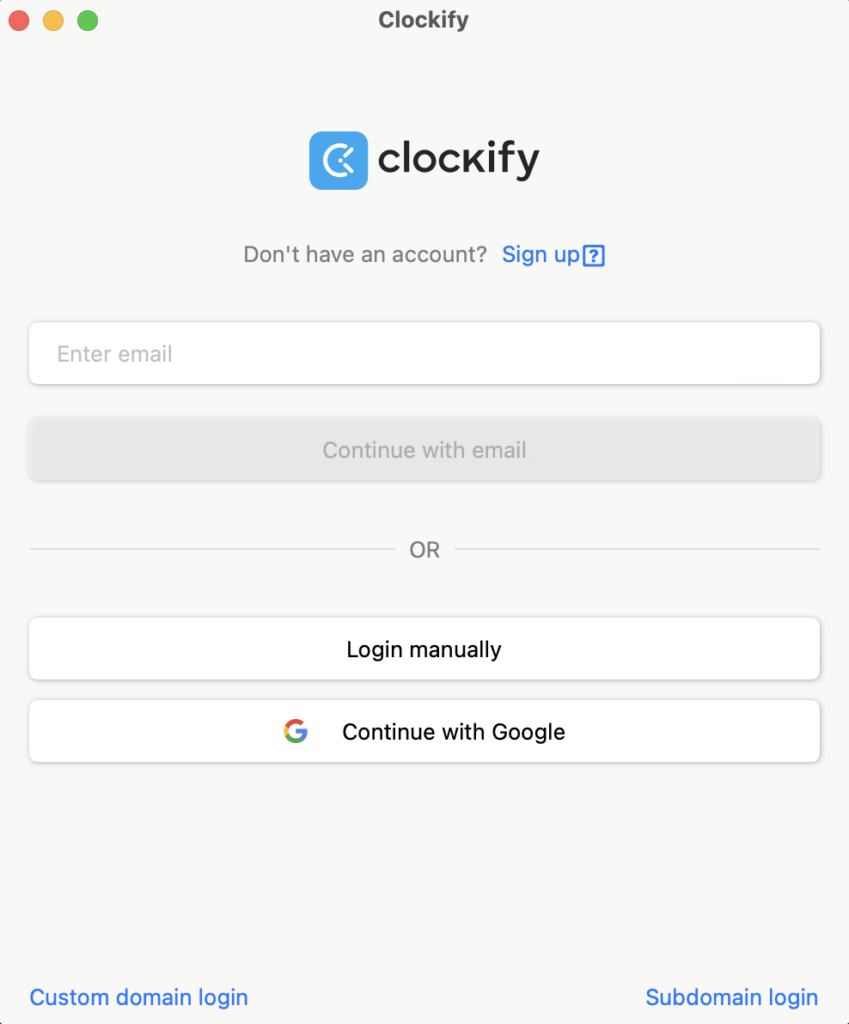
Can I Use Google To Log Into Clockify?
Yes, you can use Google to log into Clockify. On the login page, click the “Sign in with Google” button. Follow the prompts.
What To Do If I Forget My Clockify Password?
If you forget your Clockify password, click “Forgot password” on the login page. Enter your email address. Follow the instructions sent to your email.
Is Clockify Login Free?
Yes, Clockify offers a free login option. You can access basic features without any cost. Paid plans are available for advanced features.
Conclusion
Clockify login is simple and efficient. It helps you save time. Easily track your work hours. Keep projects organized. Improve productivity with just a few clicks. The user-friendly interface ensures a smooth experience. Start logging your time effortlessly. Benefit from better time management.
Perfect for individuals and teams alike. Try Clockify today and see the difference.